


This is a common problem on the production floor. Parts sticking is and can be a difficult problem to eliminate sometimes, especially if the tool has been running with no issues for some time.
So often its neglected to the point, where expensive mold releases are used. Don’t drain your profits by purchasing these releases. I asked the guys on the floor. New tooling? (it’s always been a problem). Old tooling? (it just started doing that or its always been a problem). JUST FIX IT!!!!
Most floor guys will tell you, "I know what the problem is, it happens every day when I come in." They will make a few changes and blame the other shift for not running to process, but I ask you to take a closer look and evaluate the real issue.
This sounds like a good time to use the 5 M’s troubleshooting method talked about in earlier blogs. This will shorten the variable list and keep it manageable.
So, Let’s take a closer look.
Here are few variables that maybe causing your sticking problem:
1.) Manual Part Removal -- causes inconsistent cycle time / clamp open time.
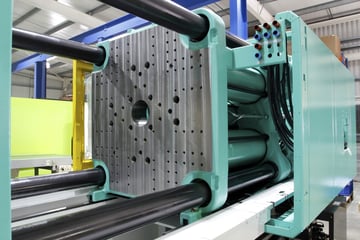
Automatic part removal or auto drop – make sure each part is ejected properly and is not sticking on pins, details, or ribs. This could cause damage to the mold. Is the EOA tooling robust enough for part removal as well as consistent? If the tool has spring loaded plates, are the springs the correct ones and are they in good shape. Is the ejector plate moving evenly? Just the slightest difference can cause part ejection issues.
2.) Machine -- Is the molding machine functioning properly? Are the correct Knock Out bars installed or the hydraulics lines and electrical cords to the ejectors hooked up and functioning correctly? Are set points being reached? Rolled edges on the parting lines causing parts to stick or partially stick in the cavity half.
3.) Mold -- Is the Mold damaged? Are parts hanging up on details, ribs, or clip towers, or lifters? Are these details clean, and free of burrs, scratches, or under cuts? Is the part hanging up in the same spot every time? Is the water properly hooked up to the mold and circulating properly? Is the proper GPM’s at the supply manifold prior to the mold? Is the water Thermolator (if used) on and circulating water correctly? Are the mold temperatures correct on both mold halves, improper temps can cause part shrinkage at a different rate and cause part to stick to the cavity half?
4.) Method -- Is the process correct and robust? Ensure there is no over-packing or under-packing of your parts. Over-packing in ribbed areas or clip towers / details can be a big cause of part hang ups. Is the established cure time enough? Mold deflection will help with getting the correct cure time setting.
5.) Material -- Is correct production material and or colorant getting used for that product. Materials shrink at different rates and colorants have specific carrier resins. Tools are cut in the beginning to certain materials due to overall shrink. Is regrind getting used in the product? Is the designated percentage correct? What regrind generation is it? This is overlooked a lot.
If you would like more information about setting up a sound purge process, or would like for me to take a look at your color change or material change procedure and cost, please comment below or email sales@asaclean.com.
Ready to reduce your production downtime to protect your profits? Learn more about how purging compounds and process efficiency work in tandem.

Comments